
This post will be of interest to some and of no interest to others. It is all about the changes we have made to our 2019 Winnebago View 24D. If that is of no interest, I completely understand. We will get back to travel and outdoors adventures ASAP. We have done some great hikes recently.
Our rig modification focus has been to enhance our full time living experience and extend our off grid (boondocking with no utilities) capabilities. Since my list is quite long I will include only the bare minimum about each change. If you are a fellow View or Navion owner and want more details just drop us a line and I will try to help
To be clear, I think it is important to emphasize that our modifications are not a result of Winnebago shortcomings. No RV, or home for that matter, is 100% perfect for everyone. Were that the case, I suspect there would be no Home Depots or Lowes. These modifications are truthfully 'personalizations' that make our RV do more closely what we need from our home on wheels. None of these are required or appropriate for everyone. In fact the standard unit off the assembly line is an incredibly well designed and implemented vehicle.
Anyway, nuff said. On to the list.

3M Command Strip broom holders above the shower to store the hanging rod out of the way.

Absolute water shut off added in addition to the one at the shower head. This one doesn't drip when in the off position and helps with water rationing when boondocking.

3M Command Strip shower mirror and holder.

3 compartment dispenser for shampoo, conditioner and shower gel.

3M Command Strip basket. Beside that is our Camco electric toothbrush holder. Both mounted with Command Strips.

Homemade counter extension that folds down against the side of the vanity when not in use. Made from 1/4 Luan plywood coated on both sides with truck bed liner. Incredibly durable and waterproof.

His and hers towel hooks added. Again 3M Command Strips used for attachment.

Tension rods in medicine cabinet (and others) with water bottle caps attached to side walls to keep them from sliding. A small piece of double sided tape is used to hold cap in place.


Camco tooth brush holder. Mounted with Command Strips.

Upgraded Bluetooth thermostat.
Note, almost everything in our coach can be controlled from our smart phones.


Circuit breakers / disconnects for solar to charger and charger to batteries.

Office Depot mail holders, one on each side of bed, to hold cell phones and Kindles at night. Attached with Command Strips.

Dual 12v usb charging ports placed overhead on both sides of the bed. Wired directly to 12v so we can charge without the inverter when boondocking. Beside the port is a switch which controls power to our Weboost cell booster so it can be easily turned off when boondocking.

Switch tapped into radio power lead so parasitic drain from radio can be turned off when boondocking.

Extra switch added as override for Bluetooth control of awning lights. We can't dim them with this, but can turn them on without launching the phone app.

Carefree Bluetooth awning controls for both awning and light. The upgrade also included a wind sensor for automatic retraction of the awning.
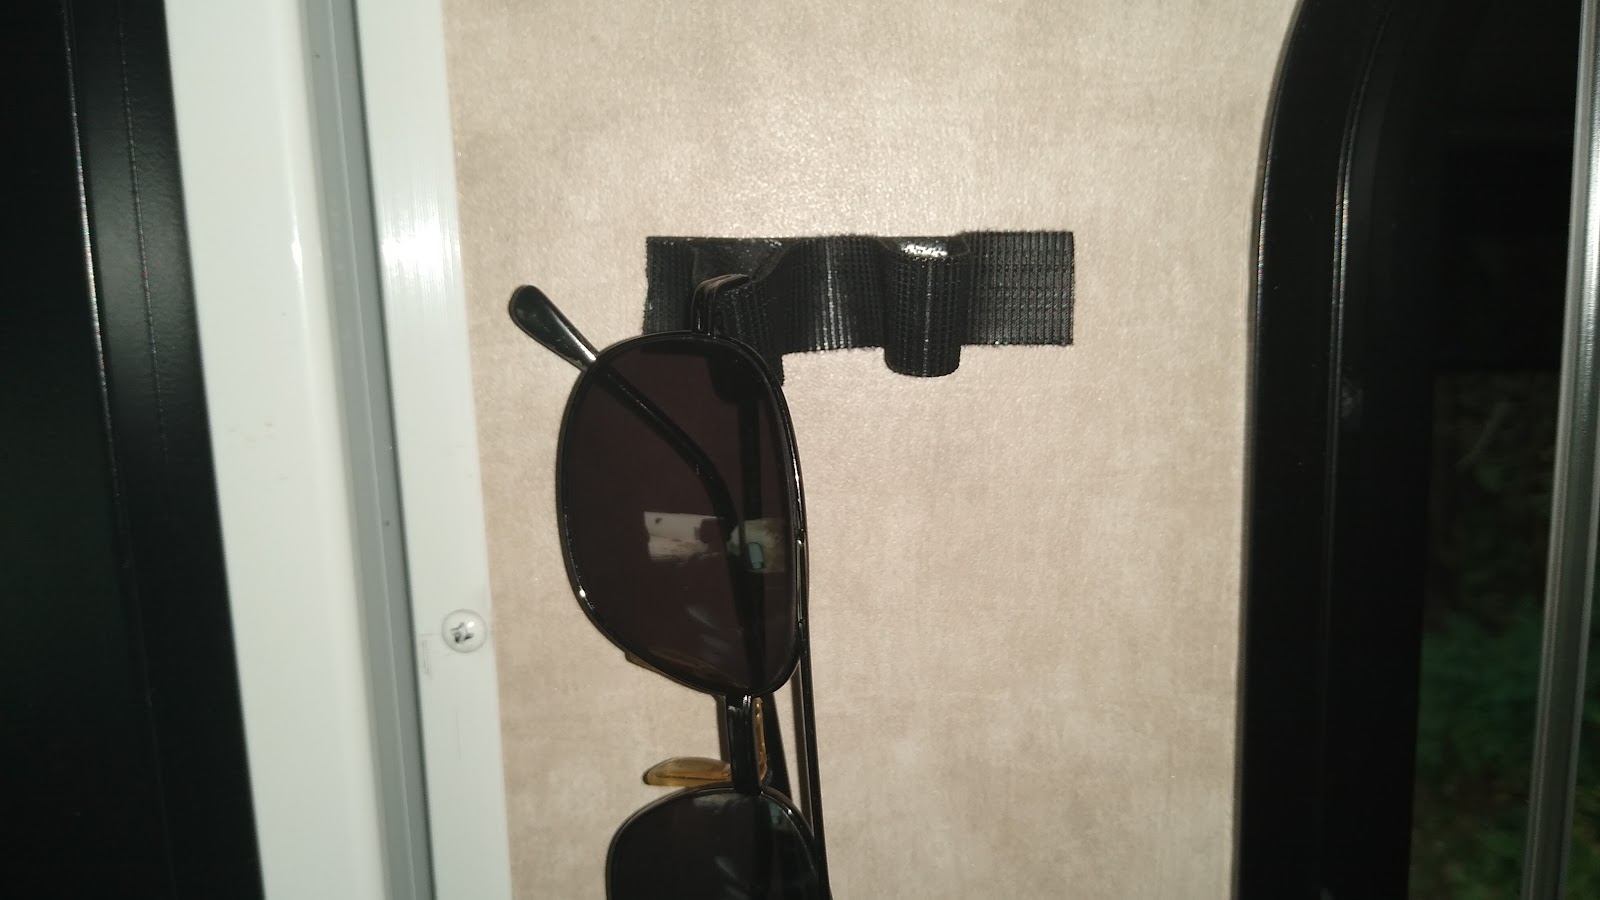
Sunglasses holder beside door. Made from a single Command Strip and a separate piece of velcro.

Small pepper spray beside the door. Attached with a Command Strip and some velcro.

Camco screen door pull rod.

In-coach router for wifi.

Wobbler Bluetooth leveling system.
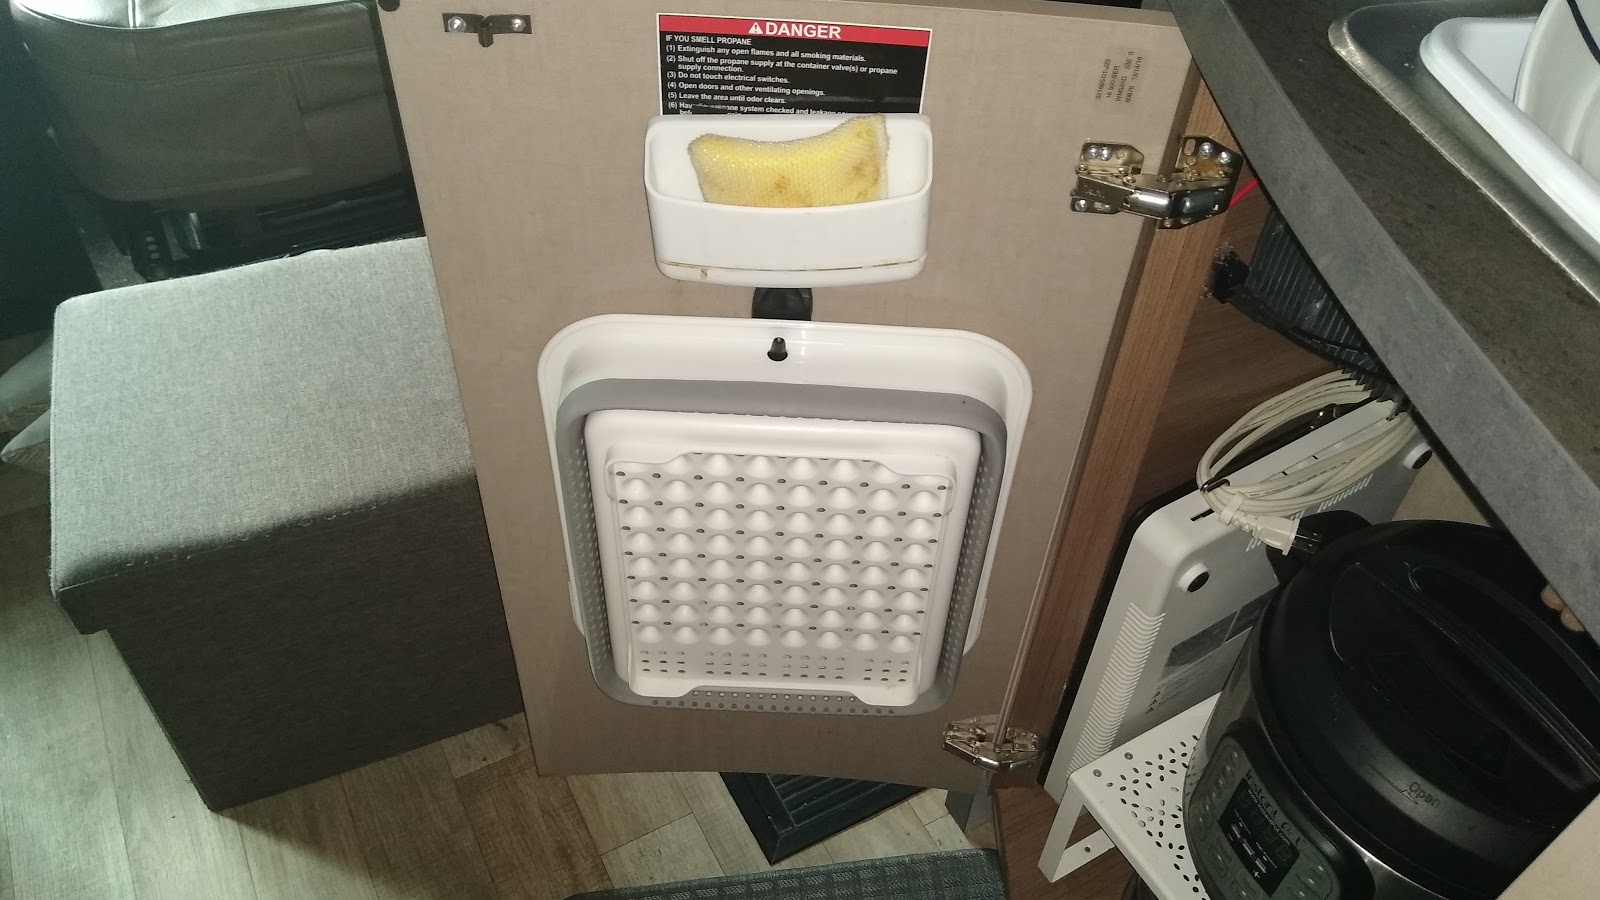
Sponge holder and collapsible dish drainer mounted on left kitchen sink cabinet door. Mounted with Command Strips.

Dishsoap holder and collapsible broom with dustpan mounted to right kitchen sink cabinet door. Mounted with Command Strips.

Filtered water dispenser with under cabinet filter. I installed a "T" after the factory filter and added a second filter for this dispenser.
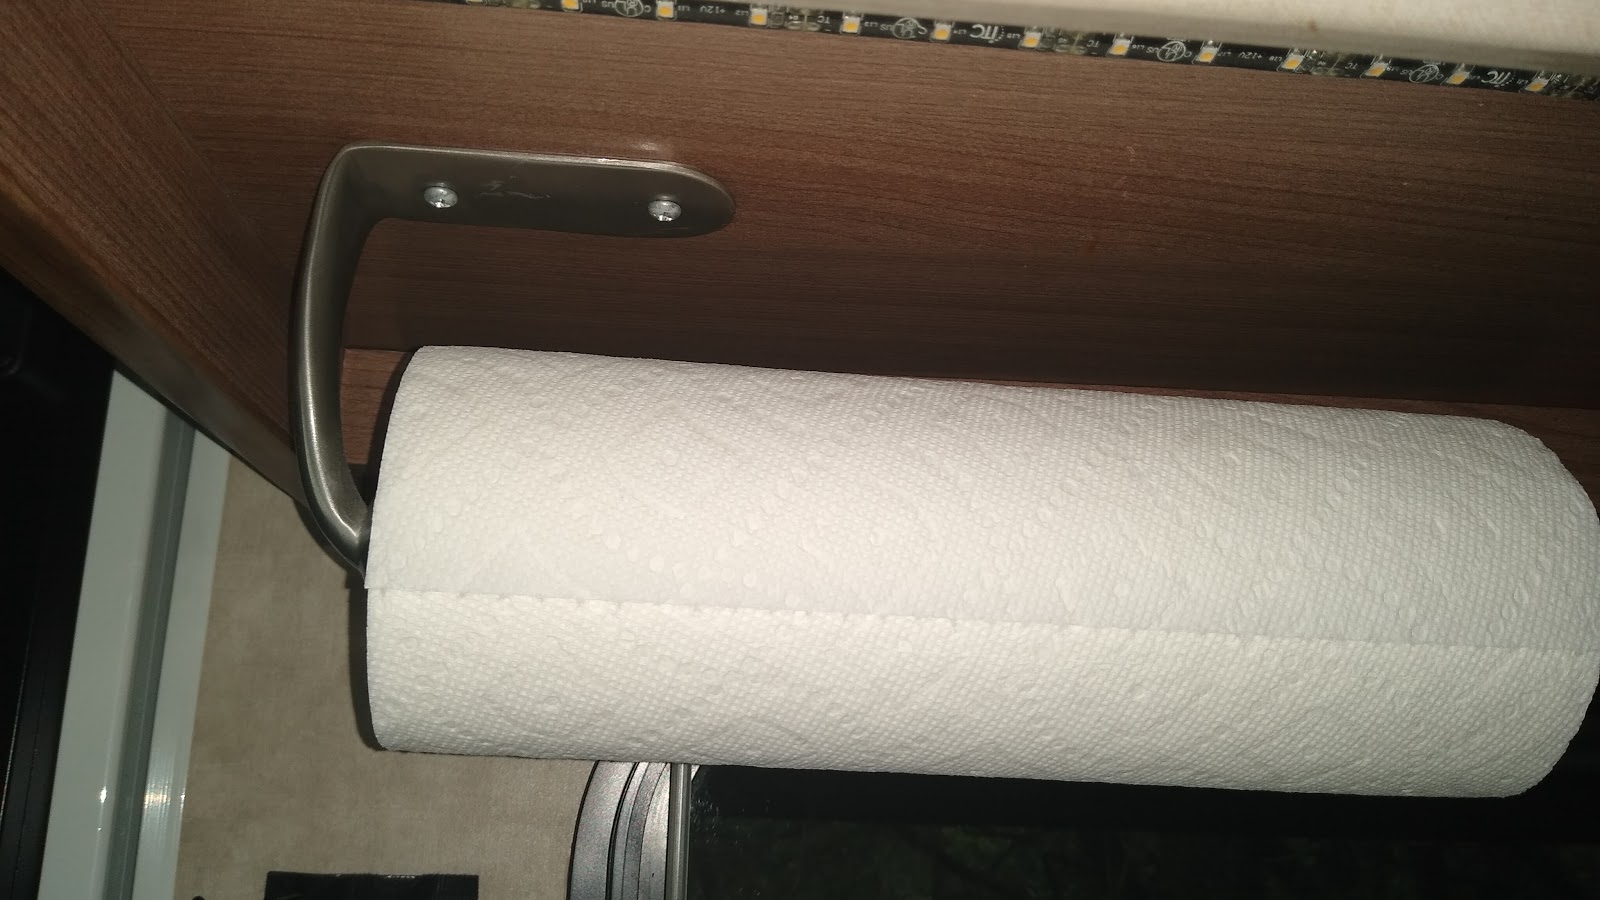
I installed a simple paper towel holder under the cabinet. This one is designed to not unroll on its own.

HDMI splitter/switch mounted behind tv to allow connection of DVR, Roku and Fire Stick.

IR remote repeater so I can control all functions of DVR, Roku, Fire Stick and HDMI splitter with tv cabinet closed.

Bluetooth transmitter connected to tv headphone jack so I can broadcast anything on tv to cab radio (see our seating setup below). Note, I used a "Y" cable so I can still amplify tv output with rear radio.
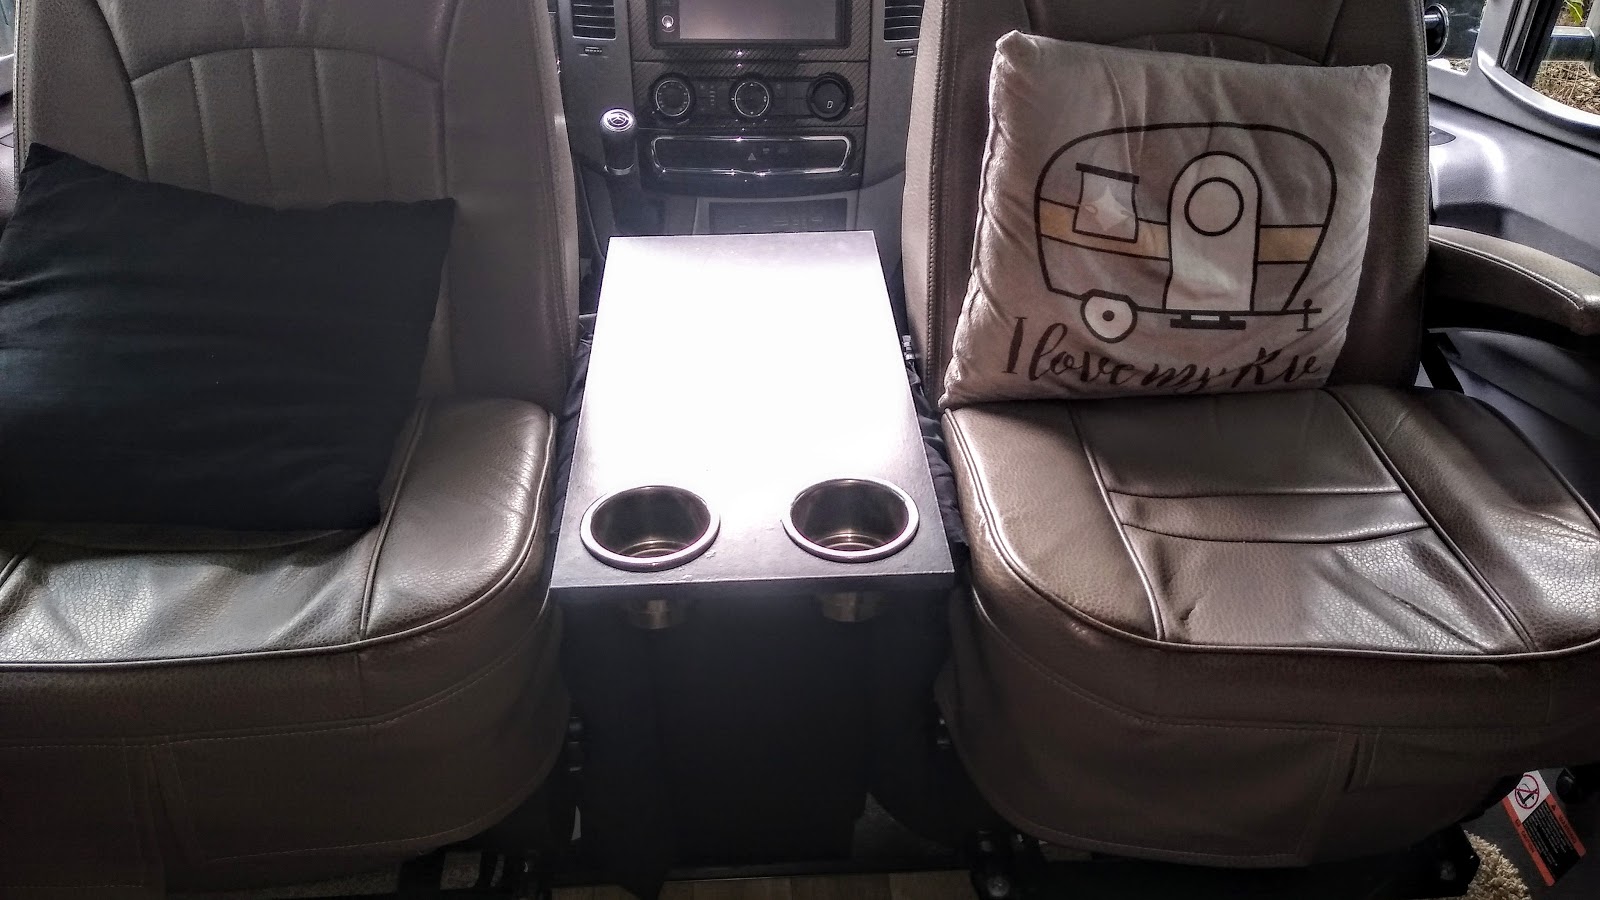
The console table between the seats is actually our trash can. We purchased a ready-made shelf at Home Depot and I added cup holders. This is screwed to the lid of the trash can.
We use it as a table when viewing tv and can still open the lid (hinged on the rear) for depositing trash. And there is no smell!

My wife took the factory curtains that surround the bed on the 24D model and sewed them into full length curtains that close off the cab area. We use the at night for privacy, and also when driving so that we only have to heat / cool the cab. Makes a huge difference.
I hung a second track on the ceiling so they move independently of the bunk curtains.

I moved the factory speakers (1 over dinette and 1 over bed) to be both over the bed.

I then installed a larger set of speakers over the dinette so we have true stereo on both locations. I wired them in parallel and we have plenty of volume at both sets.

I moved the couch base to the outward most mounting holes to provide a slightly deeper seat base. Much more comfortable and does not obstruct access to bath or fridge when slide is in.


2 Battle Born LiFePo 100 ah batteries installed in the original battery space with only slight modifications to the tray. I was even able to use the factory hold downs.
The little blue box in the picture is a Victron Bluetooth temperature and voltage monitor that feeds temperature information to all the other Victron components.

I added a 2 port usb charging location on each side of the dash. This is wired to ignition side of 12v service so they only charge with the key on.
The switch in the picture (kind of behind wire) allows me to fully power off electric the brake controller (Brake Buddy Stealth) when boondocking. The factory MB wiring harness kept it in standby mode.


NOT PICTURED: Victron 12/11/30 Smart Bluetooth battery to battery charger mounted under the passenger seat. This picture is the a/b switch which allows the boost function to work should I ever need it.


Installed a Carefree zip off awning shade.

Added a window awning with "View Through" fabric over dinette window.

Added 4 inch drop extension with anti-rattle clamps to level out tow bar pull to toad (Jeep Wrangler JK).

Added base plates to electric stabilizers.

Added Thetford tote tank mount to ladder and carry 26 gallon, 4 wheel unit.

Added 360 swivel vent to tank vent stack.

Added a Weboost directional cell antenna mounted to the ladder with woodworking clamps. Easy on and off.


Added full width sewer hose carrier under the rear of the coach. Also installed a semi-permanent 1 foot hose that stays on the city water inlet all the time. The actual water hose connects via a quick connector..
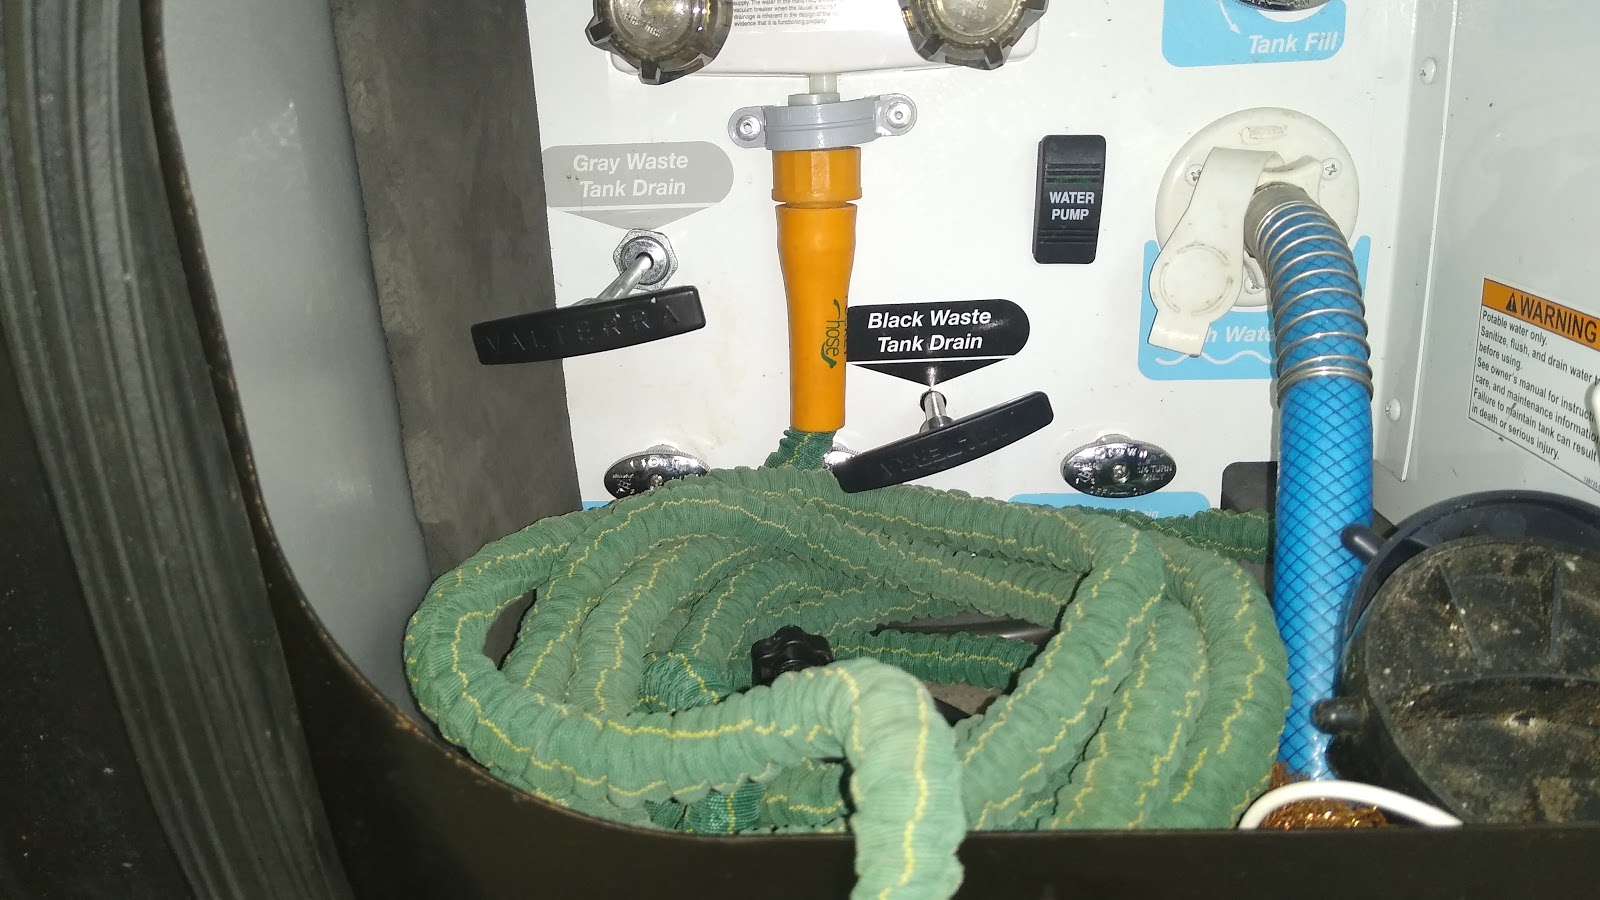
Removed the outside shower hose and adapted a 50' pocket hose. I can reach all the way around the coach and have actually rinsed her off at a rest stop after a particularly muddy back road.

Installed a Progressive Dynamics automatic transfer switch. Note, I wrap power cord and city water hose with brass wool to keep critters out.

Added RV Airflow System which increases A/C (and heat pump) air flow, quiets system and improves efficiency.
NOT PICTURED:
1) Sumo springs front and rear. Black on the rear and blue on the front
2) Hellwig sway bar on the rear
3) Agile Off-road Fox shocks on rear
5) Thermo Plus Bluetooth temperature senders in fridge, wet bay and patio.
6) 480 watts Renogy solar on glued down tilt brackets on roof
7) The original 200 watts of Zamp Solar panels are now mounted on frames for ground set up. I plug them into the prewire port in the electrical bay
I will be installing a 2k Victron Hybrid Inverter Charger and a sub-panel for the A/C. Also adding 3rd Battle Born battery.
That's it for now. I hope you are doing well, staying safe and making the best of this situation.
Thanks for reading!
_______________________________________
Cindy and Terry
Wanna see a map of where we have been?
Check out our YouTube channel:
Follow us on Instagram: the_next_hundred_miles
Follow us on Twitter:
@hundrednext
Follow us on Pinterest:
thenexthundredmiles
Questions or comments email us at:
NextHundredMiles@gmail.com